GatsbyでHP作成 その10:OGP画像の設定

SNS等でシェアした際に、きちんと画像が表示されるようにOGP画像の設定をしました。
やりたいこと
- トップページ
画像:指定した画像
タイトル:サイト名+サブタイトル - 投稿記事ページ
画像:ヒーロー画像
タイトル:記事タイトル+サイト名
seo.js
OGPが記述される、ヘッダー情報を生成する部分はどのページも、Seoコンポーネントを読み込んでいるので、src/components/seo.jsを修正します。
元の、Gatsby Starter Blogの、seo.jsから大幅に変更しました。
import * as React from "react"
import PropTypes from "prop-types"
import { Helmet } from "react-helmet"
import { useLocation } from "@reach/router";
import { useStaticQuery, graphql } from "gatsby"

const Seo = ({ description, lang, title, image, topFlag }) => {
  const { site } = useStaticQuery(query)
  const { pathname } = useLocation();

  const { siteMetadata } = site;

  const seo = {
    title: title ? `${title} | ${siteMetadata.title}` : `${siteMetadata.title} | ${siteMetadata.subTitle}`,
    description: description || siteMetadata.description,
    image: `${siteMetadata.siteUrl}${image || siteMetadata.ogpImage}`,
    url: pathname ? `${siteMetadata.siteUrl}${pathname}` : `${siteMetadata.siteUrl}`,
    pageType: topFlag ? "website" : "article",
  };

  return (
    <Helmet>
      <html lang={lang} />
      <title>{seo.title}</title>
      <meta name="description" content={seo.description} />
      <meta name="image" content={seo.image} />
      <link rel="canonical" href={seo.url} />
      {<meta property="og:site_name" content={siteMetadata.siteName} />}
      {seo.url && <meta property="og:url" content={seo.url} />}
      {seo.pageType && <meta property="og:type" content={seo.pageType} />}
      {seo.title && <meta property="og:title" content={seo.title} />}
      {seo.description && <meta property="og:description" content={seo.description} />}
      {seo.image && <meta property="og:image" content={seo.image} />}
      <meta name="twitter:card" content="summary_large_image" />
      {seo.title && <meta name="twitter:title" content={seo.title} />}
      {seo.description && <meta name="twitter:description" content={seo.description} />}
      {seo.image && <meta name="twitter:image" content={seo.image} />}
    </Helmet>
  )
}

Seo.defaultProps = {
  lang: `ja-JP`,
  title: null,
  description: null,
  topFlag: false,
  image: null,

}

Seo.propTypes = {
  description: PropTypes.string,
  lang: PropTypes.string,
  title: PropTypes.string,
  image: PropTypes.string,
  topFlag: PropTypes.bool,
}

const query = graphql`
query {
  site {
    siteMetadata {
      title
      subTitle
      description
      siteUrl
      ogpImage
      social {
        twitter
      }
    }
  }
}
`

export default Seo
Seoコンポーネントのパラメーター
| 名前 | デフォルト | 動作 |
|---|---|---|
| lang | ja-JP | 言語指定 |
| title | 未指定:“サイト名+サブタイトル” それ以外:“タイトル+サブタイトル” | |
| description | 未指定:サイト概要 | |
| image | 未指定:サイトのOGP | |
| topFlag | false | true:og-type=website false:og-type=article |
サイト情報の変更
サイト名などの情報は、gatsby-config.jsのsiteMetadataに記述されるので、こちらも変更します。
新たに、サブタイトルとOGP画像の項目を追加します。
  siteMetadata: {
    title: `ガンバラナイ`,
    subTitle: `がんばり過ぎていませんか?`,
    description: `がんばり過ぎていませんか?がんばらない技術を提供します。`,
    siteUrl: `https://ganbaranai.tech/`,
    ogpImage: `/ganbaranai-ogp.jpg`,
    social: {
      twitter: `ganbaranai_tech`,
},ogpImageに指定した画像ファイルは、staticフォルダに保存しておきます。
TOPページのOGP生成
TOPページは、src/pages/index.jsを変更します。
Seoコンポーネントのパラメーターを変更するだけです。
<Seo topFlag={true} />記事ページのOGP生成
記事ページは、src/templates/blog-post.jsです。
こちらも、基本Seoコンポーネントのパラメーターにimageを追加するだけです。
  ...
  import { GatsbyImage, getImage, getSrc } from "gatsby-plugin-image"
  ...
  const BlogPostTemplate = ({ data, location }) => {
    ...
    const imageSrc = getSrc(post.frontmatter.image)
    ...
    return (
    <Layout location={location} title={siteTitle}>
      <Seo
        title={post.frontmatter.title}
        description={post.frontmatter.description || post.excerpt}
        image={imageSrc}
      />
    ...
imageのソースパスの指定の仕方に少し躓きました。
マークダウンに指定した画像は、そのまま使われずに、gatsby-plugin-imageプラグインで生成された画像が使われるので、実際のパスはビルド時に決まります。
そのパスを取得するに、getSrc()を使うというのに気づくのに時間がかかりました。
OGP確認
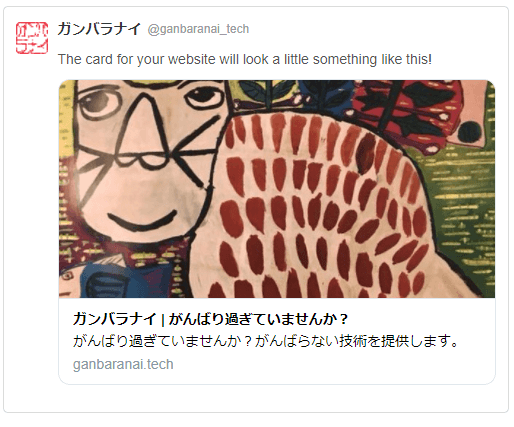
ビルドしてデプロイしたら、以下のサイトでOGPイメージを確認できます。